
ONIEからのNOSアンインストール
①ONIE画面への遷移

装置起動後、上記のような画面が出るまで待ちます。
表示されたら方向キーで「ONIE」を選択します。
②アンインストール選択
")
「ONIE: Uninstall OS」を選択
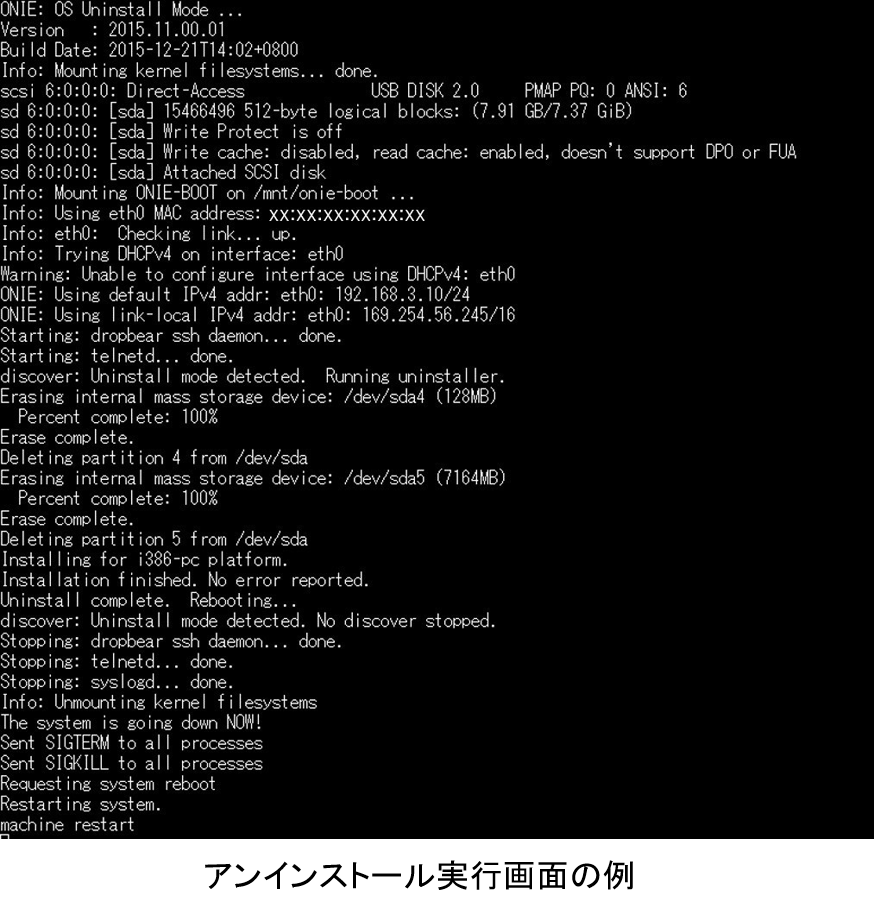
③アンインストール実行
②を実行後、自動で処理が開始し、アンインストールが完了します。
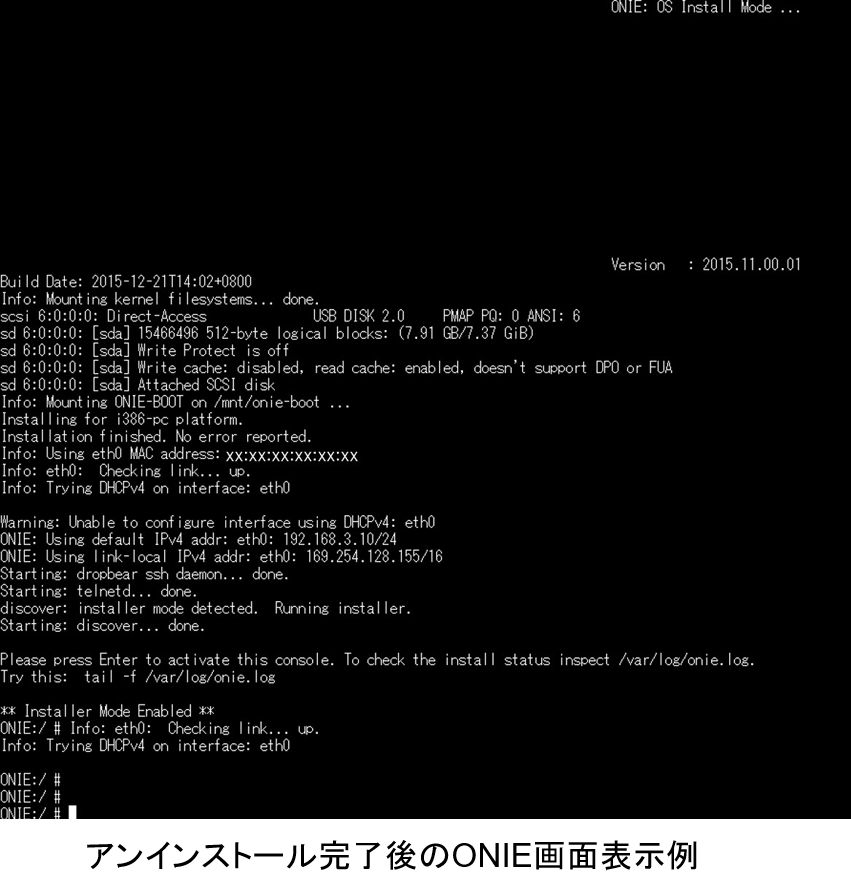
アンインストール完了後は、自動で装置が起動しONIEのコマンド画面まで遷移します。
以下はアンインストール実行画面の一部です。
Cumulus Linux CLI上からのNOSアンインストール
Cumulus Linux上から、直接NOSのアンインストールを実行することも可能です。
その手順についてもご紹介します。
①アンインストール実行予約
本コマンドでアンインストールの実行が予約され、その後再起動を実施するとアンインストールが実行されます。
cumulus@cumulus:~$ sudo onie-select -k
以下は実行例です。
cumulus@cumulus:~$ sudo onie-select -k
We trust you have received the usual lecture from the local System
Administrator. It usually boils down to these three things:
#1) Respect the privacy of others.
#2) Think before you type.
#3) With great power comes great responsibility.
[sudo] password for cumulus:CumulusLinux! #cumulusアカウントのパスワード入力
WARNING:
WARNING: ONIE uninstall mode requested.
WARNING: This will wipe out all system data.
WARNING: Make sure to back up your data.
WARNING:
Are you sure (y/N)? y
Enabling ONIE uninstall mode at next reboot...done.
Reboot required to take effect.
cumulus@cumulus:~$
アンインストール実行予約を解除する場合は、以下のコマンドを実行します。
cumulus@cumulus:~$ sudo onie-select -c
Cancelling pending uninstall at next reboot...done.
cumulus@cumulus:~$
②再起動実行
cumulus@cumulus:~$ sudo reboot
③アンインストール実行
②を実行後、自動で処理が開始し、アンインストールが完了します。
アンインストール完了後は、自動で装置が起動しONIEのコマンド画面まで遷移します。
アンインストール実行画面は、ONIEからのアンインストール実行時と同様であるため、ここでは省略します。
ホワイトボックススイッチに興味ある方はこちらへ